User Management
This lesson will show you how to create users and groups and how to add users to different groups
User creation
Automatic user creation and deletion may have been set up for the portal, however, manual user and deletion can in all cases be administered via the Users screen.
Create new user
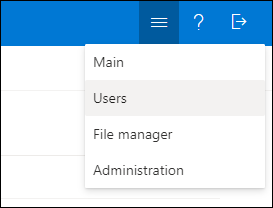
- Open the Users screen.
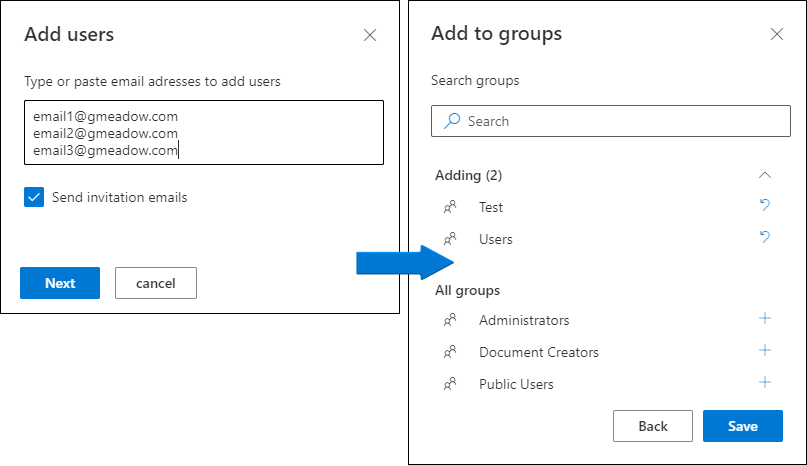
- Select Add users.
- Insert email address(es) of the new user(s).
- Depending on the settings for user sign in, it may be possible to deselect that invitation emails are sent. Deselect if appropriate.
- Select Next.
- Add one or several Groups which the new user(s) should be member of.
- Select Save.
Create new group
- Open the Users screen.
- Select Groups in the top left corner.
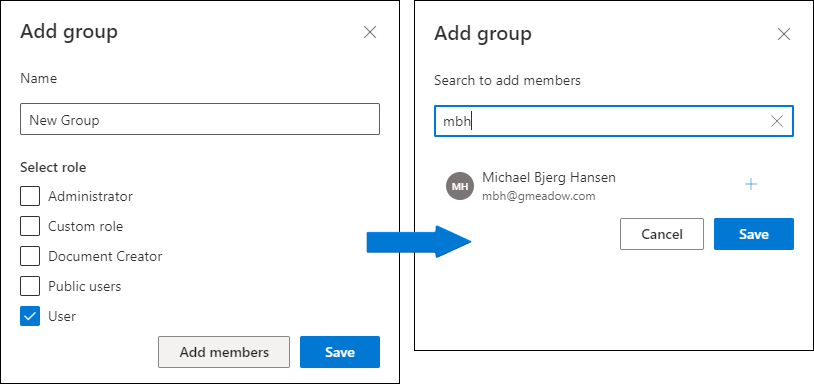
- Select Add group.
- Insert name of the new group.
- Select role (will depend on the roles configuration in the Administration settings, however Users, Document Creators and Administrators will always appear).
- If relevant, select Add members to add members to the group immediately, insert name or email to find the user(s) and press + (repeat as appropriate).
- Select Save.
- Select Close.
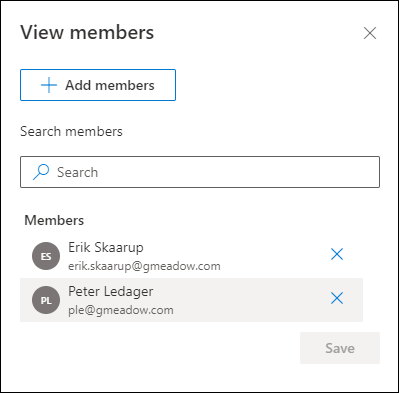
Add users to existing groups
- Open the Users screen.
- Select Groups in the top left corner.
- Select the group which you want to add members to.
- Select Membership.
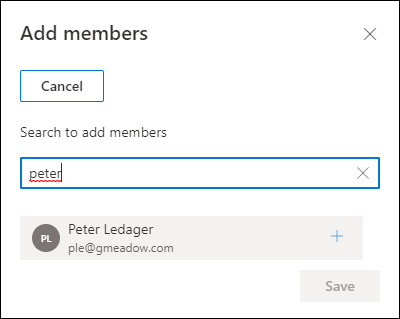
- To add members, select Add members and find the users via the search function and Select + (repeat as appropriate).
- Select Save.
- Select Close.
Remove users from existing groups
- Open the Users screen.
- Select Groups in the top left corner.
- Select the group which you want to remove members from.
- Select Membership.
- Select the X next to the member which you want to remove.
- Select Save.
- Select Close.
Delete group
- Open the Users screen.
- Select Groups in the top left corner.
- Select the group which you want to delete.
- Select Delete.
- Confirm deletion by selecting Delete.
